In spite of its reputation, pastry making is actually a very easy, flexible project that requires only short amounts of hands on attention at any given time.
Ingredients for a single 9" pie crust
(Recipe adapted from Jeanne Lemlin's excellent Vegetarian Classics)
- Ice water
- 1 ¼ cups all purpose flour
- 2 teaspoons sugar
- 6 tablespoons very cold butter, cut in to small pieces
- 2 tablespoons canola oil
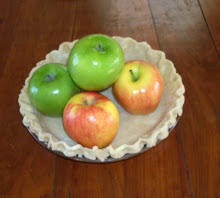
- 1 ½ teaspoons acid, such as lemon juice or apple cider vinegar (since I’ll be using this for an apple pie, I used apple cider vinegar)
Method

Fill a glass full of ice water

Mix flour and sugar in a large bowl

Add butter pieces and press into the flour, leaving pea sized chunks. A pastry blender is ideal, forks and knives also work.

In a separate bowl, mix 3 tablespoons of the ice water, 2 tablespoons canola oil, and 1 ½ teaspoons of apple cider vinegar (or lemon juice)

Mix the water/oil/acid mixture into the flour mixture. If dough is too dry, sprinkle in small amounts of additional ice water until it holds together

Time to get hands on! Press the remaining crumbs into the dough and form into a ball

Form the dough into a disk and wrap in plastic wrap. Refrigerate at least 30 minutes...up to a few days, depending on when your pie making schedule picks up again. I prefer to make the dough the day before I roll it out.

Take dough out of the fridge and let rest at room temperature for a few minutes. Flour the rolling surface...with a lot of flour, at least as much as shown in the picture. Place dough on the surface and flour the top of the dough.

Gently, taking many passes, roll the dough out from the center, a little at a time. Periodically lift it up in sections to make sure it's not sticking to the rolling surface--and add more flour as needed to keep from sticking. Guide the dough into a circle, but don't worry about getting the edges exactly right. If the dough cracks, just press it back together. Keep going until the diameter of the dough is a few inches larger than the pie plate. For the next few steps, the dough will go through an ugly duckling stage--don't worry, just keep going very gently and lovingly.

Gently lift dough and fold in half...

...and then in quarters. Brush off excess flour as you go.

Unfold dough into pie plate

And now you have...one very ugly looking pie crust. But don't despair, the ugly duckling is about to become a swan.

Fold the outer edge under, gradually evening out to a uniform thickness all around the pie. If any rips or cracks form, just press them together.

Now make it look pretty. Keep circling the pie while you press the edge lightly between your fingers. It will take more than one pass around--keep going until it looks lovely.

Next time we'll pick up the project at this point and turn it into a delicious apple pie.
Notes
- If the dough becomes too soft to handle at any point in the rolling process, it's because the butter is melting. Just put in back in the fridge for a few minutes.
- The original recipe calls for pre-baking the crust with pie weights. In my experience, no good comes of pre-baking, so I skip it. If you like shrinkage and excess browning, be my guest.
- To avoid excess browning, cover the edges with aluminum foil. Remove foil in the last 15 minutes of baking.
No comments:
Post a Comment